The alert queue
Open “Alerts”, in the Investigate section of the menu. The queue is on the left, the open alert on the right. Three tabs filter the queue: “Mine”, “Unassigned” and “All”. The counter gives the number of alerts to handle.
Quicker still: on your home page, “Handle the next alert” opens the most urgent of your alerts or, when none is yours, the most urgent one nobody holds. The same action is in the search (Ctrl K).
The queue is ordered by decision first, then by priority. The priority combines the score, the amount and the age of the alert, from 0 to 6. Each row also shows the time left before the handling target your organisation set, and “Overdue” once it has passed.
Some rows carry “Random check” or “Borderline case”: these are accepted transactions, drawn at random or scored just under the threshold. Your answer teaches the model a great deal there.
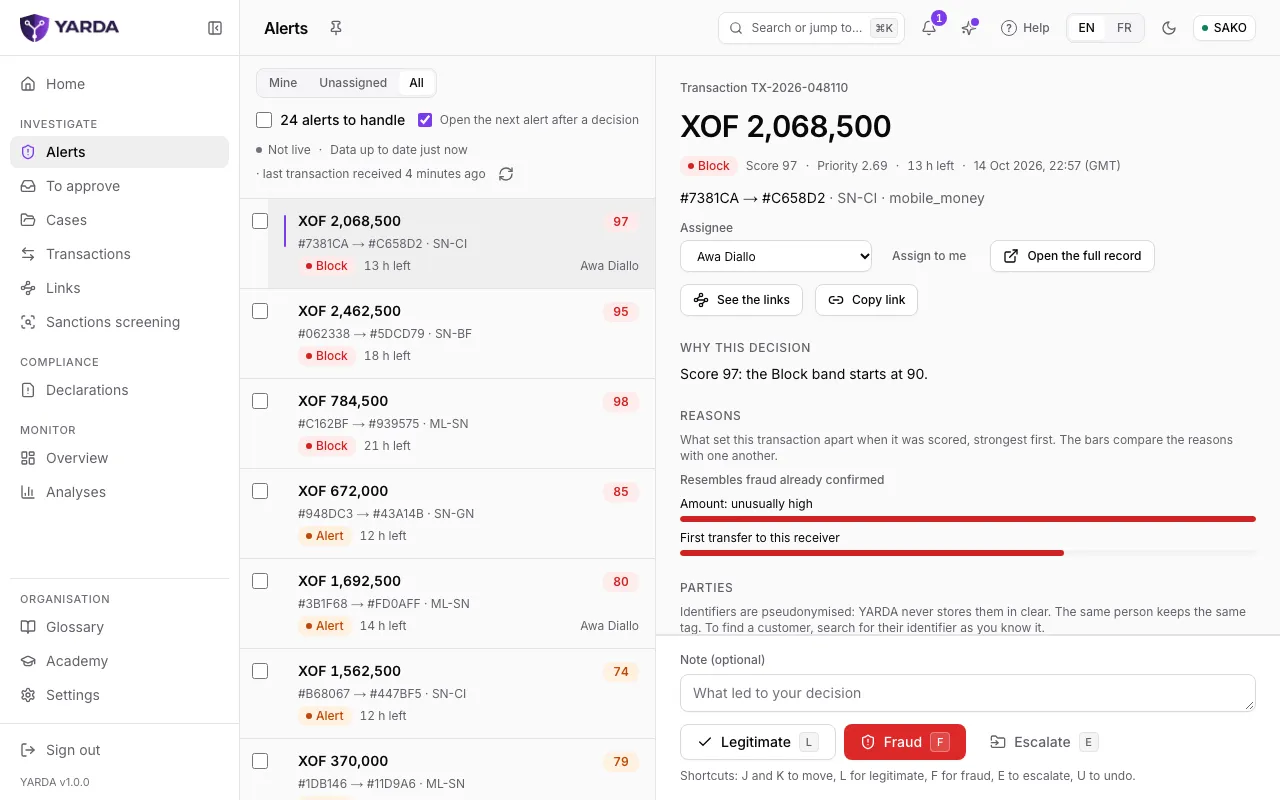
Reading an alert
The open alert shows the amount, YARDA’s decision, the score, the priority and the time left, then the parties and the corridor. “Why this decision” says which band the score falls in; “Reasons” ranks what set the transaction apart when it was scored, strongest first.
The parties’ identifiers are pseudonymised: YARDA never stores them in clear, and the same person always keeps the same tag. To find a customer, search for their identifier as your system knows it.
- “Assignee” and “Assign to me”: take the alert yourself, or hand it to a colleague.
- “Open the full record” opens the transaction, with its timeline and the profile of each party.
- “See the links” shows the network around the parties; “Copy link” gives the alert’s address, to share with a colleague.
Deciding
At the foot of the alert, an optional note, then three decisions:
- “Legitimate” (key L): the transaction is normal, the alert was a false alert.
- “Fraud” (key F): choose the fraud type from your taxonomy, then “Label as fraud”.
- “Escalate” (key E): the alert leaves the queue to be investigated in a case, new or existing. Once it is escalated, “Open the case” takes you there.
A decision can be undone for a few seconds with “Undo”, or the U key. After that, open the transaction to label it again. When “Open the next alert after a decision” is ticked, the console moves on to the next alert by itself.
From the keyboard and in bulk
- J and K to move between alerts, L, F and E to decide, U to undo.
- X selects the open alert; Shift-click selects a range; the box at the top of the queue selects the whole page.
- On a selection: “Legitimate”, “Fraud…”, “Assign…”, “Remove the assignment” or “Clear the selection”. Alerts that could not be handled stay in the queue, with the reason.
The To approve inbox
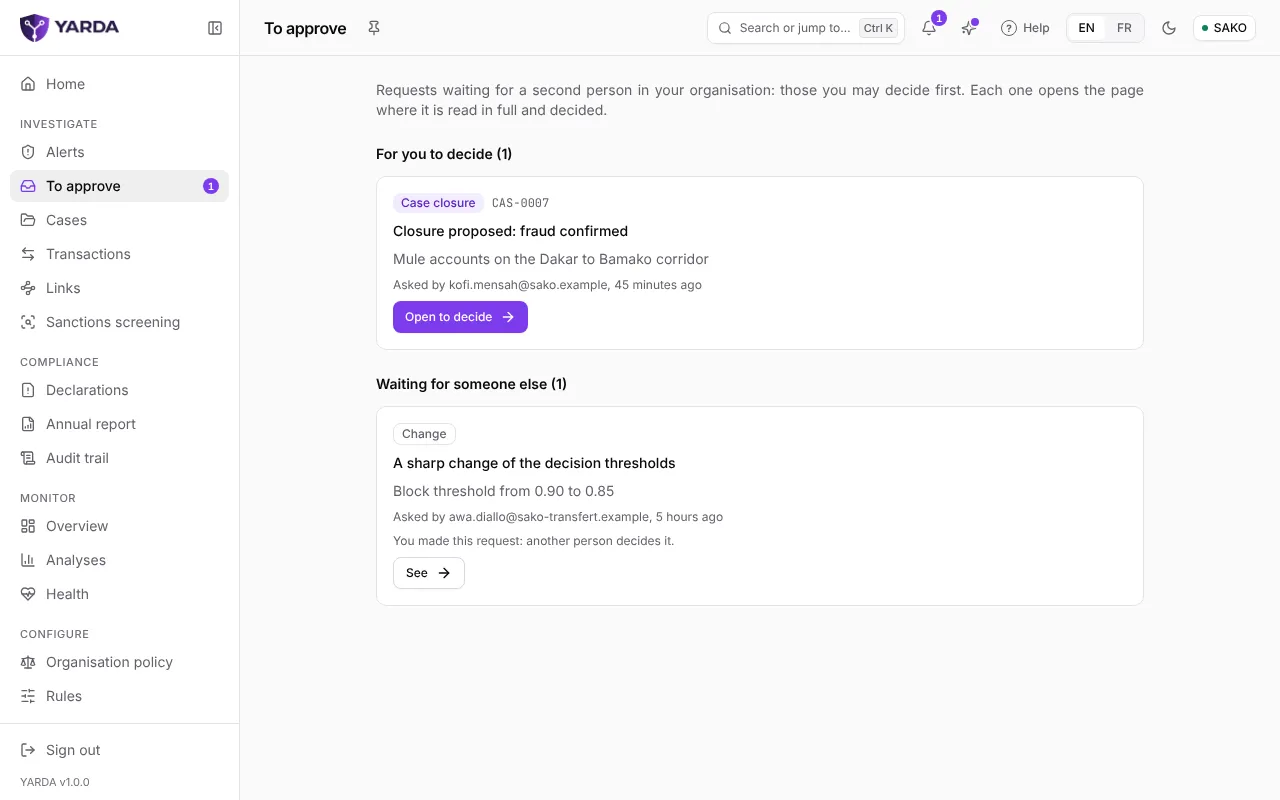
When your policy asks for a second person, some acts wait for an approval: closing a case, a report ready to file, a request for information to the customer before it is sent, a rule version, a marked change of the thresholds or an access by YARDA’s support. They arrive in “To approve”, whose count the menu shows.
The page separates “For you to decide” and “Waiting for someone else”. “Open to decide” takes you to the page where the request reads in full and is decided. You never decide your own request, nor those your role may not decide.
Screenshots taken on the fictitious demonstration data, on .